


Introduction
Rate limiting is necessary so that our APIs are not overwhelmed with requests. It is necessary to prevent DDoS attacks. In this article, we are going to be building an application that sends SMS via Twilio Programmable SMS. We are going to implement rate limiting on the application so that the same user can’t send more than a specified amount of API requests in a time frame.
User Journey
The user calls the API to send SMS to a particular phone number. Once the user calls the endpoint more than a specified number of times, the user is blocked from sending API requests for a specified amount of time.
Tutorial Requirements
To follow this tutorial, you are expected:
- Have sufficient understanding of Python and Flask
- Have Redis installed on your machine.
- Have Python3 installed on your machine.
- Have a Twilio Account. If you are new to Twilio, create a free account now .
Setting up your Twilio account
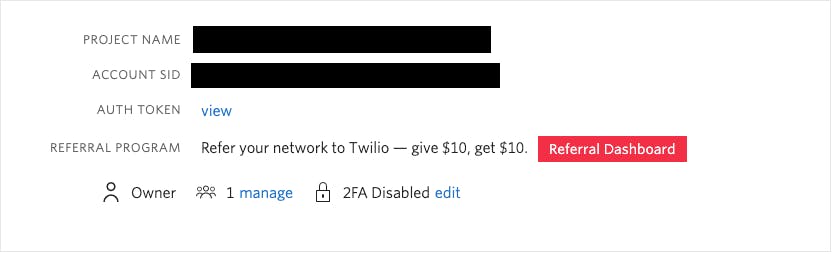
To follow this tutorial, you need your Twilio ACCOUNT_SID, AUTH_TOKEN and Twilio number. You can get the account sid and auth token here .
To get your Twilio number, you have to buy a number with sms capabilities. You can only send sms to verified phone numbers while you are in trial mode. You can view and add verified phone numbers here .
Application Setup
As mentioned earlier, we are going to be using the Flask framework as our web server and Redis as a temporary data store.
Setting up the application directory and virtualenv
Make sure you have Python 3 installed on your computer. Run the following commands in your terminal to create the project folder and virtual environment for this project.
- Create project directory named
flask_rate_limitingmkdir flask_rate_limiting - Enter into the project directory
cd flask_rate_limiting - Create a virtualenv for the project
python3 -m venv venv - Activate the virtualenv.
For macOS and Linux users:
source venv/bin/activate
The virtualenv helps create an isolated environment to run our project.venv\Scripts\activate
Structuring the Project
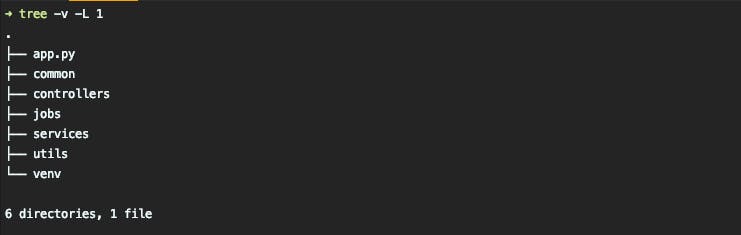
Next, we are going to setup the project’s folder structure. In the application directory, run the commands below to set up the folder structure.
mkdir common controllers jobs services utils
touch app.py
At this point, your folder structure should look like this:
Installing Project Dependencies
Finally, let’s install all the dependencies we are going to use in this project.
- Flask: This library will be used to run our web server.
- Redis: This library will be used to interface with the Redis key-value store.
- Twilio Python Helper Library: This library will be used to help send SMS.
Run the command below to install the above dependencies:
pip install Flask redis twilio
Building Messaging API
In this section, we are going to build the API to send sms. First of all, let’s create utility functions to help validate requests and send API responses. Create 2 files called request.py and response.py in the utils/ folder. Copy the code below into the request.py file:
def validate_body(data, required_fields):
    for field in required_fields:
        if field not in data:
            return False, field
    return True, None
The above function checks the request body against the required fields are returns the appropriate status based on whether the request body has all the required fields.
Copy the code below into the response.py file:
import json
import time

from flask import jsonify


def stringify_objectid(data):
    str_data = json.dumps(data, default=str)
    return json.loads(str_data)


def response(status, message, data, status_code=200):
    """
    :param status : Boolean Status of the request
    :param status_code: Status Code of response
    :param message : String message to be sent out as description of the message
    :param data : dictionary representing extra data
    """
    if data:
        data = stringify_objectid(data)
    res = {'status': status, 'message': message, 'data': data, 'timestamp': timestamp()}
    return jsonify(res), status_code


def error_response(message, status='error', code='R0', status_code=400):
    res = {'message': message, 'status': status, 'code': code}
    return jsonify(res), status_code


def timestamp():
    """
    Helper Function to generate the current time
    """
    return time.time()
The above functions help send api responses to the user.
Next, we are going to create a file to store the variables we are going to use inside the project. Create a file called config.py and copy the following inside:
import redis
import os

MAX_REQUEST_COUNT = os.getenv('MAX_REQUEST_COUNT')

TIMEOUT = os.getenv('TIMEOUT')

ACCOUNT_SID = os.getenv('ACCOUNT_SID')

AUTH_TOKEN = os.getenv('AUTH_TOKEN')

TWILIO_NUMBER = os.getenv('TWILIO_NUMBER')

redis_client = redis.Redis(host='localhost', port=6379)
The file contains the account sid, auth token and twilio number which are gotten from the environment variables. We also created a redis client that connects to our local redis instance.
Next, we are going to write the logic to send sms. Create a file called message.py in services/ folder and copy the following inside:
from twilio.rest import Client

from common.config import ACCOUNT_SID, AUTH_TOKEN, TWILIO_NUMBER

client = Client(ACCOUNT_SID, AUTH_TOKEN)


def send_sms(data):
    for phone in data['to']:
        message = client.messages.create(
            from_=TWILIO_NUMBER,
            to=phone,
            body=data['message']
        )
        print(f'=====> Sent message to :> {phone} || Sid: {message.sid}')
Next, we are going to create a queue in which SMS requests are going to be pushed. We are creating this queue because we want the SMS sending process to be a background process. Create a file called sms.py in the jobs/ folder and copy the following inside:
from multiprocessing import Queue

from services.message import send_sms

message_queue = Queue()


def start_message_job():
    while True:
        if message_queue.empty():
            continue
        data = message_queue.get()
        send_sms(data)
The start_message_job function listens on the queue for new data. When data is pushed to the queue, it gets it and then calls the send_sms function to send the SMS.
Next, we are going to create the process that executes the start_message_job function. Create a file called __init__.py and copy the following code inside:
from multiprocessing import Process

from .sms import start_message_job


def terminate_worker(worker):
    try:
        worker.terminate()
        worker.join()
        worker.close()
    except Exception as err:
        print('====> Error occurred terminating process', err)


def init_sms_worker():
    worker = Process(target=start_message_job)
    worker.start()
    return worker
The init_sms_worker function creates a process object that executes the start_message_job function and starts the process. The terminate_worker function stops the process passed to it and makes sure it releases the resources it holds.
Next, we are going to write the function that processes the API request. Create a file called message.py in the controllers/ folder and copy the following inside:
from flask import Blueprint, request
from jobs.sms import message_queue
from utils.request import validate_body
from utils.response import error_response, response

message = Blueprint('message', __name__)

@message.route('/send', methods=['POST'])
def send():
    body = request.get_json()
    status, missing_field = validate_body(body, ['to', 'message'])
    if not status:
        return error_response(f'{missing_field} is required')
    message_queue.put(body)
    return response(True, 'Queued', None)
The send function gets the request body, checks that the body has the required fields and then pushes it to the message queue.
Finally, copy the following code into the app.py file:
import atexit

from flask import Flask

from controllers.message import message
from jobs import init_sms_worker, terminate_worker


def create_app():
    worker = init_sms_worker()
    atexit.register(terminate_worker, worker)
    return Flask(__name__)


app = create_app()


@app.route('/')
def home():
    return '<h1>Messaging platform</h1>'


app.register_blueprint(message, url_prefix='/message')

if __name__ == '__main__':
    app.run()
We can see from the above code snippet that we execute the init_sms_worker function when the application is starting and we use the atexit module to make sure that the terminate_worker function is executed with the process object sent as an argument when the application is shutting down.
We use the register_blueprint function to tell the web server that it should use the message blueprint to process requests starting with /message.
Rate Limiting Middleware
This is the main section of the article. In this section, we are going to create the middleware that performs the rate-limiting function. It is going to be making use of the Redis client created in the config.py file earlier.
Add the following code snippet to the controllers/message.py file:
...
from common.config import MAX_REQUEST_COUNT, TIMEOUT, redis_client
...
@message.before_request
def rate_limiting():
    ip = request.remote_addr
    count = redis_client.get(ip)
    count = int(count) if count else None
    if count is not None:
        if count > MAX_REQUEST_COUNT:
            return error_response("You can't send another request at this time.")
        redis_client.incr(ip)
    else:
        redis_client.set(ip, 1, TIMEOUT)
...
In the above function, we get the user’s IP address and try to use it as a key to get a value from Redis, if the value doesn’t exist, we set the IP address as key and 1 as the value on Redis with the TIMEOUT variable telling Redis when to delete the record from the store. If the value exists, we check if it’s greater than the specified MAX_REQUEST_COUNT. If it’s bigger then the max request count, we return an error response informing the user that she can’t send another request at that particular time. If the value is less than the max request count, we tell Redis to increment the value by 1.
From the above logic, we can see that the user has to wait till the record gets automatically deleted from the Redis store to make another request.
Your controllers/message.py file should now look like this:
from flask import Blueprint, request

from common.config import MAX_REQUEST_COUNT, TIMEOUT, redis_client
from jobs.sms import message_queue
from utils.request import validate_body
from utils.response import error_response, response

message = Blueprint('message', __name__)


@message.before_request
def rate_limiting():
    ip = request.remote_addr
    count = redis_client.get(ip)
    count = int(count) if count else None
    if count is not None:
        if count > MAX_REQUEST_COUNT:
            return error_response("You can't send another request at this time.")
        redis_client.incr(ip)
    else:
        redis_client.set(ip, 1, TIMEOUT)


@message.route('/send', methods=['POST'])
def send():
    body = request.get_json()
    status, missing_field = validate_body(body, ['to', 'message'])
    if not status:
        return error_response(f'{missing_field} is required')
    message_queue.put(body)
    return response(True, 'Queued', None)
Testing the application
To run the application, execute the command below in your terminal:
python app.py
You should see something like the image below displayed in your terminal:

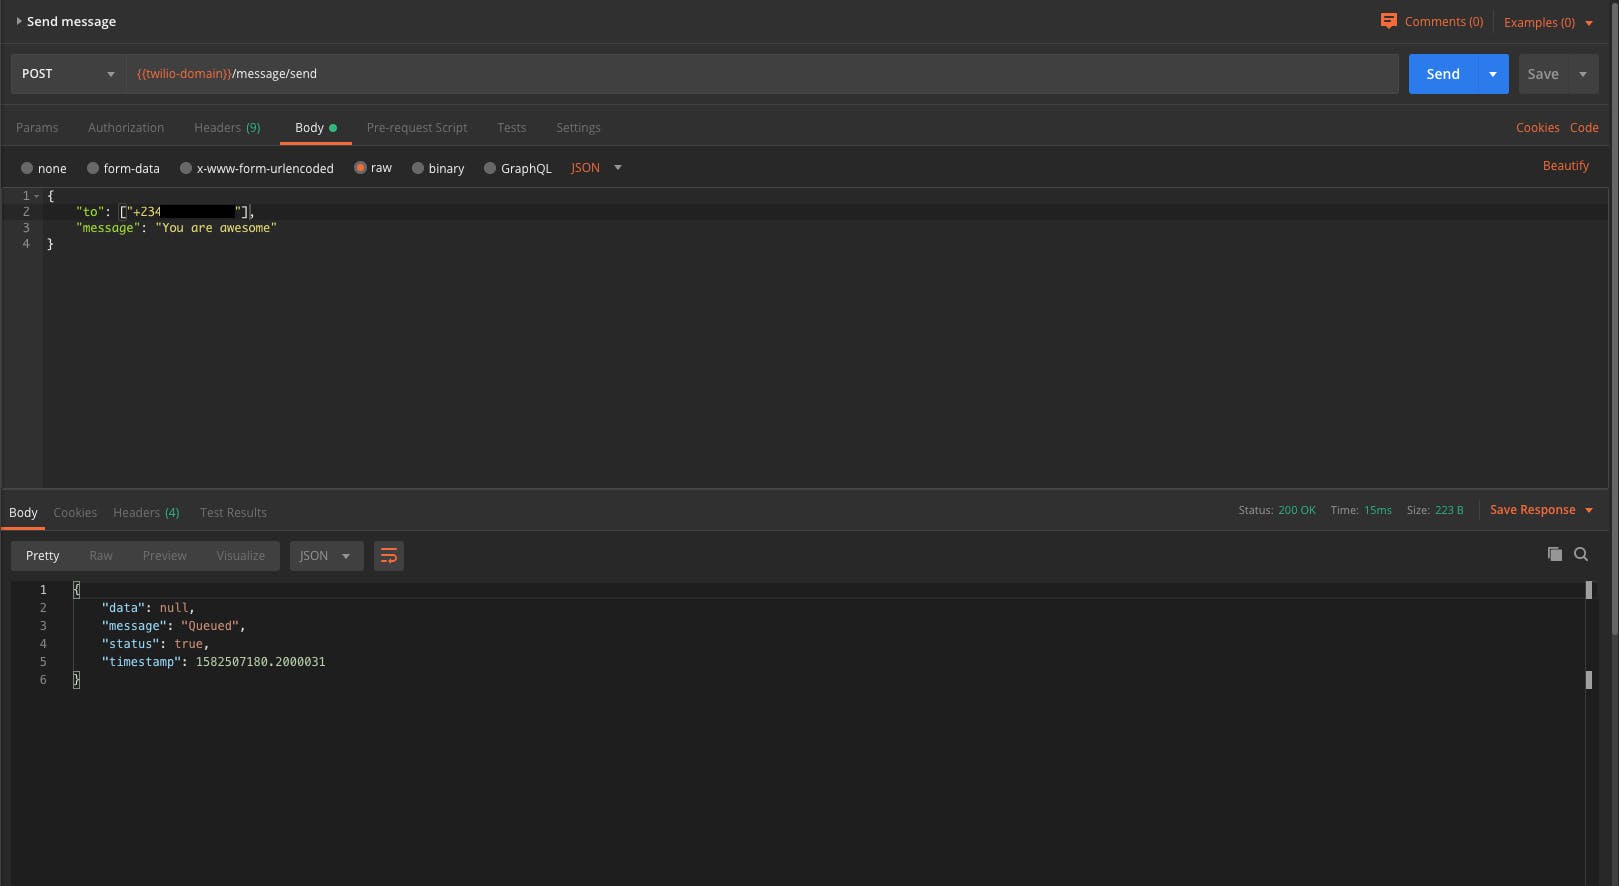
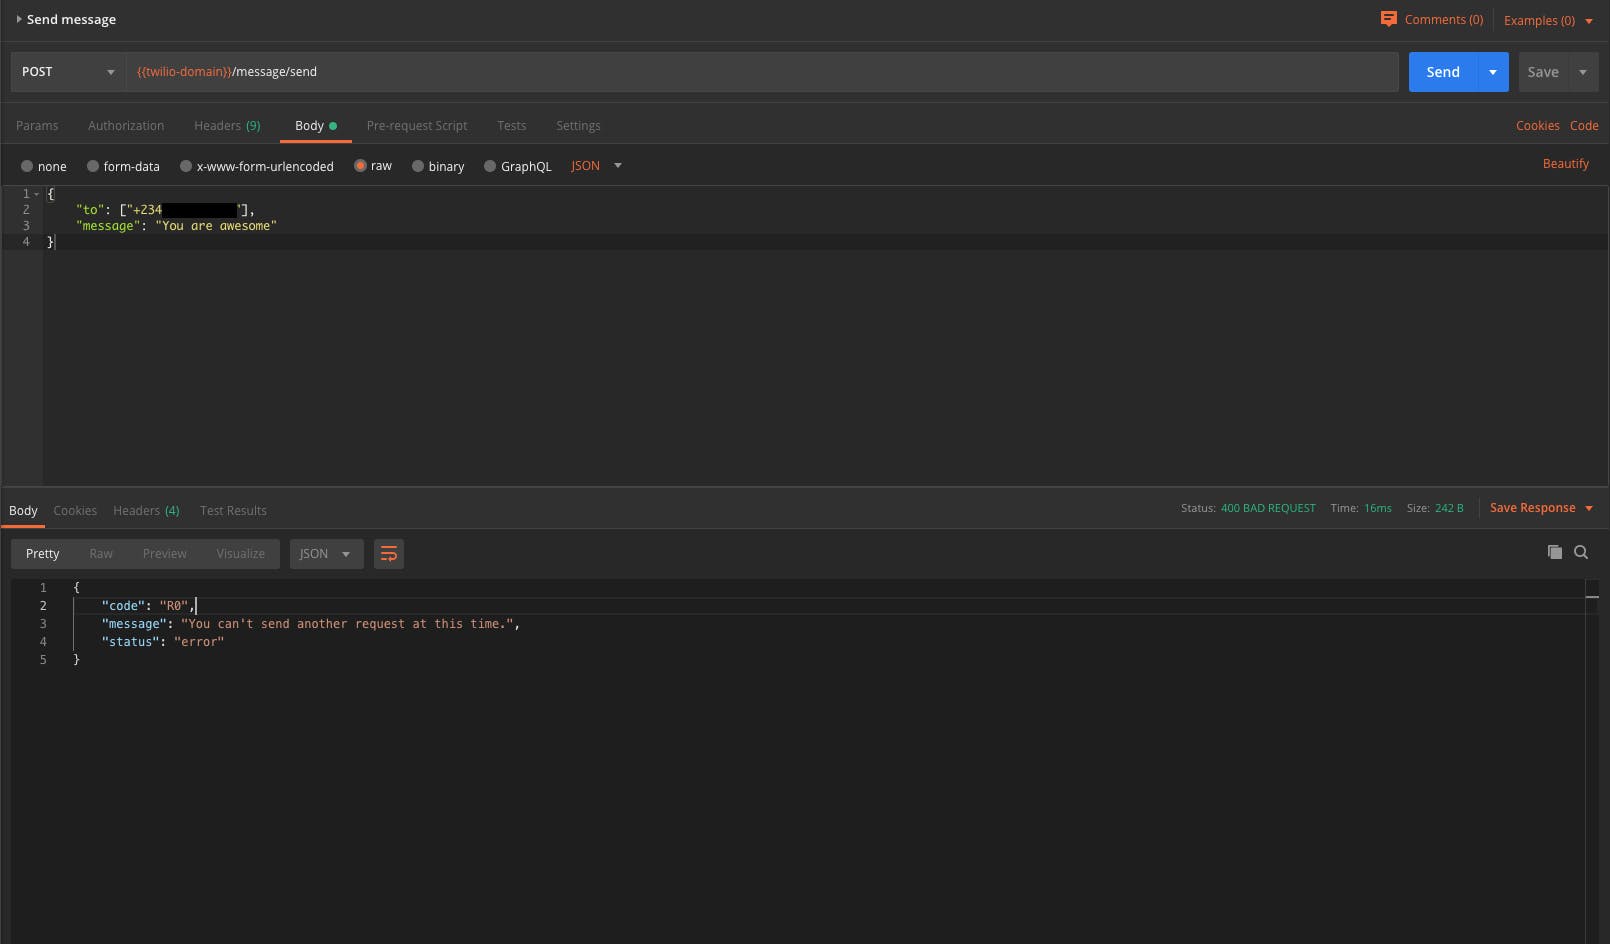
You can change the MAX_REQUEST_COUNT variable in the config.py file to any value you want and test the endpoint. When the number of times you call the endpoint is greater than the MAX_REQUEST_COUNT, you should see an error message. An example of this is shown below:
When a request is sent:
When the number of requests is greater than the MAX_REQUEST_COUNT:
Conclusion
We have now come to the end of the tutorial. We have successfully implemented rate limiting on an SMS sending application with Python, Flask, Twilio and Redis. You will find the source code for this tutorial here .